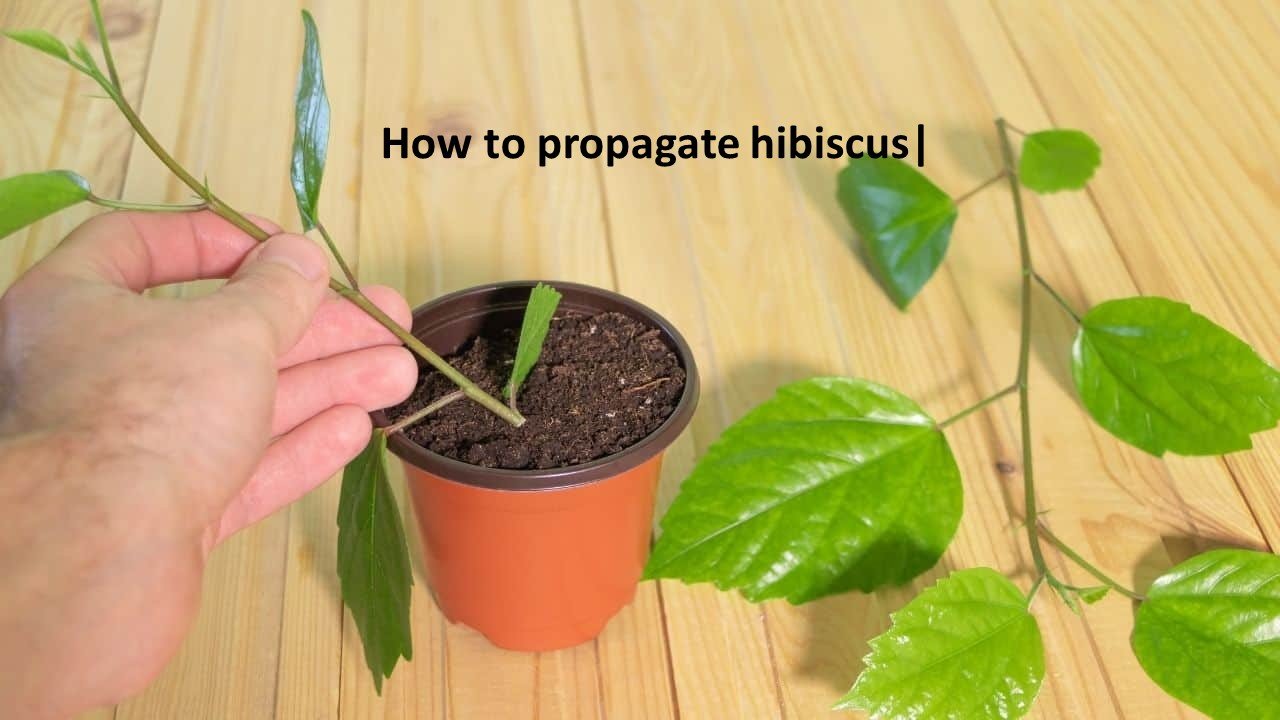
How to propagate hibiscus | 3 Perfect step wise guidelines for hibiscus propagation
How to propagate hibiscus: Hibiscus belongs to the genus of flowering plants in the mallow family, Malvaceae. It has more number of species.native.They are known for their large flowers 🌺, of different size and colour.There are more than hundred species found that are used throughout the world as food and medicine.
The large, trumpet-shaped flowers have five or more petals, and come in a range of colors, including white, pink, orange, red, yellow, purple, and multi-hued patterns. Hibiscus blossoms open wide, inviting pollinators from bees to hummingbirds to reach in for a deep drink of nectar.
Hibiscus rosa-sinensis was named by Carolus Linnaeus. The Latin term rosa-sinensis literally means “rose of China”, though it is not closely related to the true roses.Hibiscus or rosemallow is a genus of plants with a flower of bright colours. It grows mostly in the tropics, but some species grow in cool climates.
Hibiscus rosa-sinensis is the national flower of Malaysia, called Bunga Raya in Malay. Introduced into the Malay Peninsula in the 12th century, it was nominated as the national flower in the year 1958 by the Ministry of agriculture.
Diversity of Hibiscus:
There are over 200 species of hibiscus, each with its own unique characteristics.Some species are shrubs,while others are trees or even vines.The flowers can be seen in various colours like red, pink, yellow, orange, and purple.
Methods of Propagation in hibiscus:
Commonly used types of propagation are
- Stem cutting
- Grafting
- Air layering
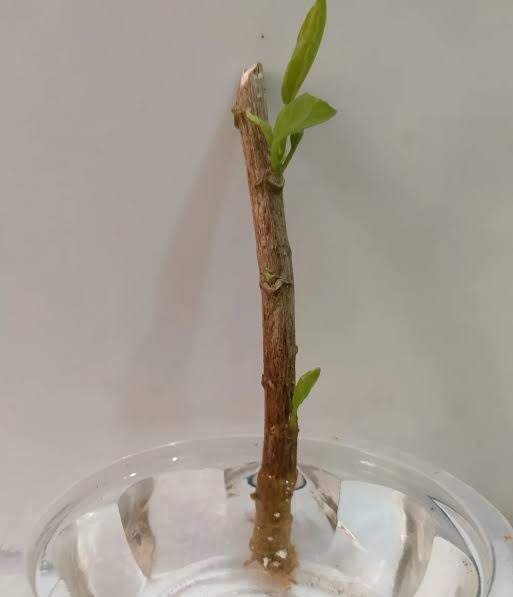
Stem Cutting in hibiscus:
Do you know how to propagate hibiscus using stem cutting?Next to seed, propagation through stem cuttings is the most convenient and popular method of plant propagation. Most cuttings fall into this category.
- A stem cutting is any cutting taken from the main shoot of a plant or any side shoot growing from the same plant or stem. The facility with which different species can be propagated in this way is largely determined by experience of a propagator.
- There are, however, a few general considerations which help in selection of suitable cutting. First of all, it is essential for the cuttings to have sufficient reserve food to keep tissues alive until roots and shoots are produced.
- The shoots with high carbohydrate content usually root better. To maintain high carbohydrate content in a shoot, ringing or notching stems down to the wood are useful practices. As a general rule, cuttings from young plants root better, but if older shoots of the plants are cut back hard, very often they can be induced to produce suitable shoots for rooting.
Three types of stem cuttings:
- Hardwood
- Softwood
- Semi-hardwood
(i) Hardwood cuttings in hibiscus:
- Hardwood cuttings are prepared during dormant season, usually from one-year-old immature shoots of previous season’s growth. Only healthy shoots are selected and the weak, fast growing shoots with long internodes should be avoided.
- The length of the cuttings varies from 10 to 45 cm in length and 0.5 to 2.5 cm in diameter, depending on the species.
- Usually, the cuttings of 25-30 length and with pencil thickness are preferred. Each cutting should have at least two buds.
- While preparing the cutting, a straight cut is given at the base of the shoot below the node while a slanting cut, 1 to 2 cm above the bud, is given at the top of the cutting.
- This helps in maintaining the polarity of the shoot and if rain occurs, water does not accumulate on the tip of the cutting, which saves the cutting from fungal infection.
- It is often advantageous to take hardwood cuttings with a heel, that is, with a piece of older wood, attached to the base of a cutting. Mallet hardwood cutting should also be preferred.
(ii)Semi hardwood cutting in hibiscus:
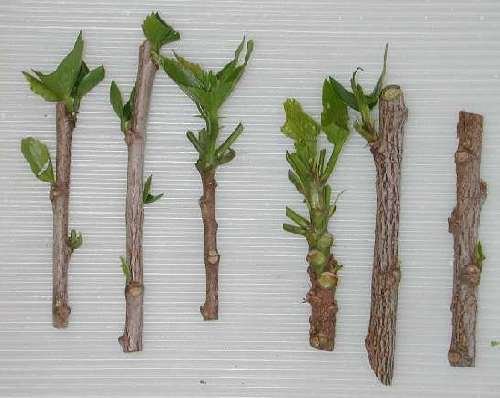
- The semi-hardwood cuttings are prepared from partially matured, slightly woody shoots. These are succulent and tender in nature and are usually prepared from growing wood of current season’s growth.
- Usually those shoots, which snap clean when broken, are considered ideal for preparation of semi-hardwood cuttings. The length of the cuttings varies from 7 to 20 cm.
- The cuttings are prepared by trimming the cuttings with a straight cut below a node and removing a few lower leaves. However, it is better to retain two to four leaves on the cuttings.
- Treating the cuttings with IBA (5,000 ppm) before planting gives better results. Similarly, while planting, one quarter of their length should be inserted in the soil.
- The best time for taking such cuttings is summer, when new shoots have emerged and their wood is partially matured.
(iii) Softwood cuttings in Hibiscus:
- Softwood cuttings is the name given to any cuttings prepared from soft, succulent and non-lignified shoots, which have not become hard or woody.
- Usually, the cutting size is 5.0 to 7.0 cm,but it varies from species-to-species.
Grafting in hibiscus:
Some of the most popular types of grafts that can be used on hibiscus are
- Cleft graft,
- Bark graft,
- Tongue graft and
Cleft grafting in Hibiscus:
- It is an old method of grafting and is particularly suitable in rootstocks having diameter greater than the scion.
- Rootstock with 5-7 cm or more girth is selected for this purpose.
- The rootstock TTis cleft grafted after decapitating the stock 45 cm above the ground level.
- The beheaded rootstock is split to about 5 cm deep through the centre of the stem with a sharp knife or a chisel.
- When the knife is removed, a hard wooden wedge is inserted to keep it open for the subsequent insertion of the scion.
- The scion of 15 to 20 cm size is taken from a terminal shoot, which is more than three months old and then it is wedged securely (6-7 cm).
- The cleft of the scion is slipped into the split of the stock. In thicker stocks, more than one scion can be inserted. The graft should be thoroughly waxed to prevent wilting of the scion.
- The scion starts growing after 2 to 3 months of grafting. The right time for cleft grafting is the later part of the dormant season or just before the start of the active growth.
Bark grafting In hibiscus:
It is a simple and rapid method of propagation and gives high success. Moreover, it does not require special instruments either. Some nurserymen prefer it, because it can be done without splitting the stub, which prevents the entry of decay organisms.
- Similarly, it can even be done in branches, which are 25 to 30 cm long. It should be done in spring when the bark of the stock slips easily.
- It is important to note that the scion used in bark grafting should be dormant. In actual practice, the stock is first sawed off at a point, where bark is smooth.
- If the stock is thick, many scions can be inserted. For each scion, bark is split downward, about 5 cm from the top end of stub. Scions of 10-12 cm long, containing 2-3 buds are collected from dormant wood and are prepared by giving a slanting cut (5 cm) downward along one side of the base.
- On the other side, a small cut is given. The longer cut of the scion is placed against the wood.
- The scion is kept firmly by using adhesive tape or string.
- Afterwards, all the exposed portions of the stub and scion should be covered with melted wax.
- If grafting is successful, the scion would start sprouting after 6-8 weeks of grafting.
Tongue grafting in hibiscus:
Tongue grafting is a popular technique for grafting hibiscus plants. It is a relatively simple and reliable method that can be used to propagate desirable varieties, combine different characteristics onto a single plant, or save a plant that is diseased or damaged.
Air layering:
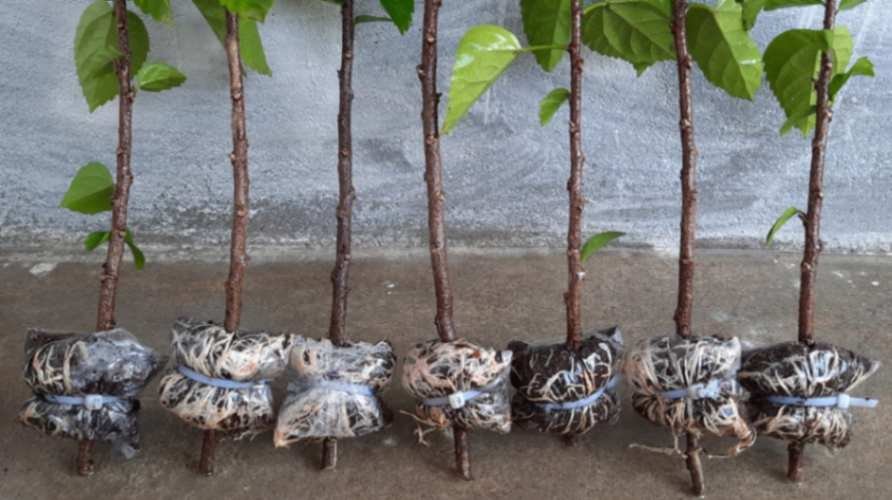
Air layering is a specialised form of layering, which was originally introduced in China and now widely used for propagation of many horticultural plants.
It is popularly known as gootee or marcottage. In all forms of layering, rooting is induced by bringing the stem in contact with the soil or other moist medium but air layering is quite distinct from others.
- In this method of layering, the moist medium is brought to the stem, the latter being left in its original position i.e.. roots are formed on the stem well above the ground without using soil at all.
- It is a useful method for propagating rare and valuable plants, which are difficult or impossible to propagate through cuttings and where ordinary methods of layering are not practicable.
- Thus, plants with rigid branches borne high above the ground, which could not be brought down to low level, are highly suitable for air layering.
- Clean young shoots are best for air layering.
- They are prepared by making an upward cut about 5 cm long at or about the centre of the shoot.
- The shoot is then girdled by removing a 2cm wide ring of bark.
- The upper part of the wound is applied with IBA paste made in lanolin.
- The wound is covered with moist sphagnum moss in a way to provide complete cover to it.
- In the past, there had been difficulty in air layering because of drying of the moss grass but now this problem appears to have been largely overcome by the use of very thin polyethylene film as a wrapping material.
- This film is wrapped around the moss grass in such a manner that it does not leave any opening, which would allow evaporation of moisture from the moss grass.
The advantage of air layering:
- That it allows transfer of air but practically no moisture can escape through it.
- Air layering may be done in the spring or rainy season. Rooting often occurs within a month or so under all favourable conditions.
- The rooted layers may be severed from the mother plant and planted in the nursery under a shaded place until they are established in the field.
Care of Potting Mix:
- Opt for a well-draining, slightly acidic potting mix. Add perlite or vermiculite for additional drainage.
- Commercial mix specifically formulated for hibiscus can also be used.
Necessary Light required for propagated plant:
- Hibiscus thrives in bright, indirect sunlight.
- A south-facing window with sheer curtains would be ideal.
- Too much direct sun can scorch the leaves, while too little can hamper growth.
Watering of propagated hibiscus:
- Water deeply when the top inch of soil feels dry.
- Avoid overwatering, as this can lead to root rot.
Humidity required by propagated plant :
- Moderate humidity levels should be ma. Misting the leaves regularly or placing the pot on a pebble tray filled with water can help.
Fertiliser needed for growth:
- Balanced fertiliser should be used.
- Diluted to half of the strength during the growing season (spring and summer). Avoid fertilising during winter.
Temperature required for growing:
- Hibiscus prefers warm temperatures between 65-80°F (18-27°C).
Advanced technique in how to propagate hibiscus:
Seed Propagation technique in hibiscus:
- Hibiscus can be propagated from seeds. Hence it is a lengthy process true to type can not be achieved.
Grafting technique in propagation of hibiscus:
- This advanced technique allows you to combine desired traits from different hibiscus varieties onto a single rootstock.
Pruning of propagated Hibiscus:

- Pruning encourages bushier growth and more blooms.
- Pinch off new growth tips and prune older branches to maintain desired shape.
Conclusion:
In propagation of hibiscus the cuttings treated with high concentration of IBA, performed the best in rooting and survival percentage. Semi- hardwood cuttings and cleft grafting gave the best result in terms of rooting and survival performance.
So, Increasing the quality planting material of hibiscus, cutting and grafting are the easy propagation method for developing the hibiscus plant as soon as possible.